

Accessing Forms
To open your forms, select your chat in the dashboard and click the Forms tab in the left sidebar.
Creating and editing a form
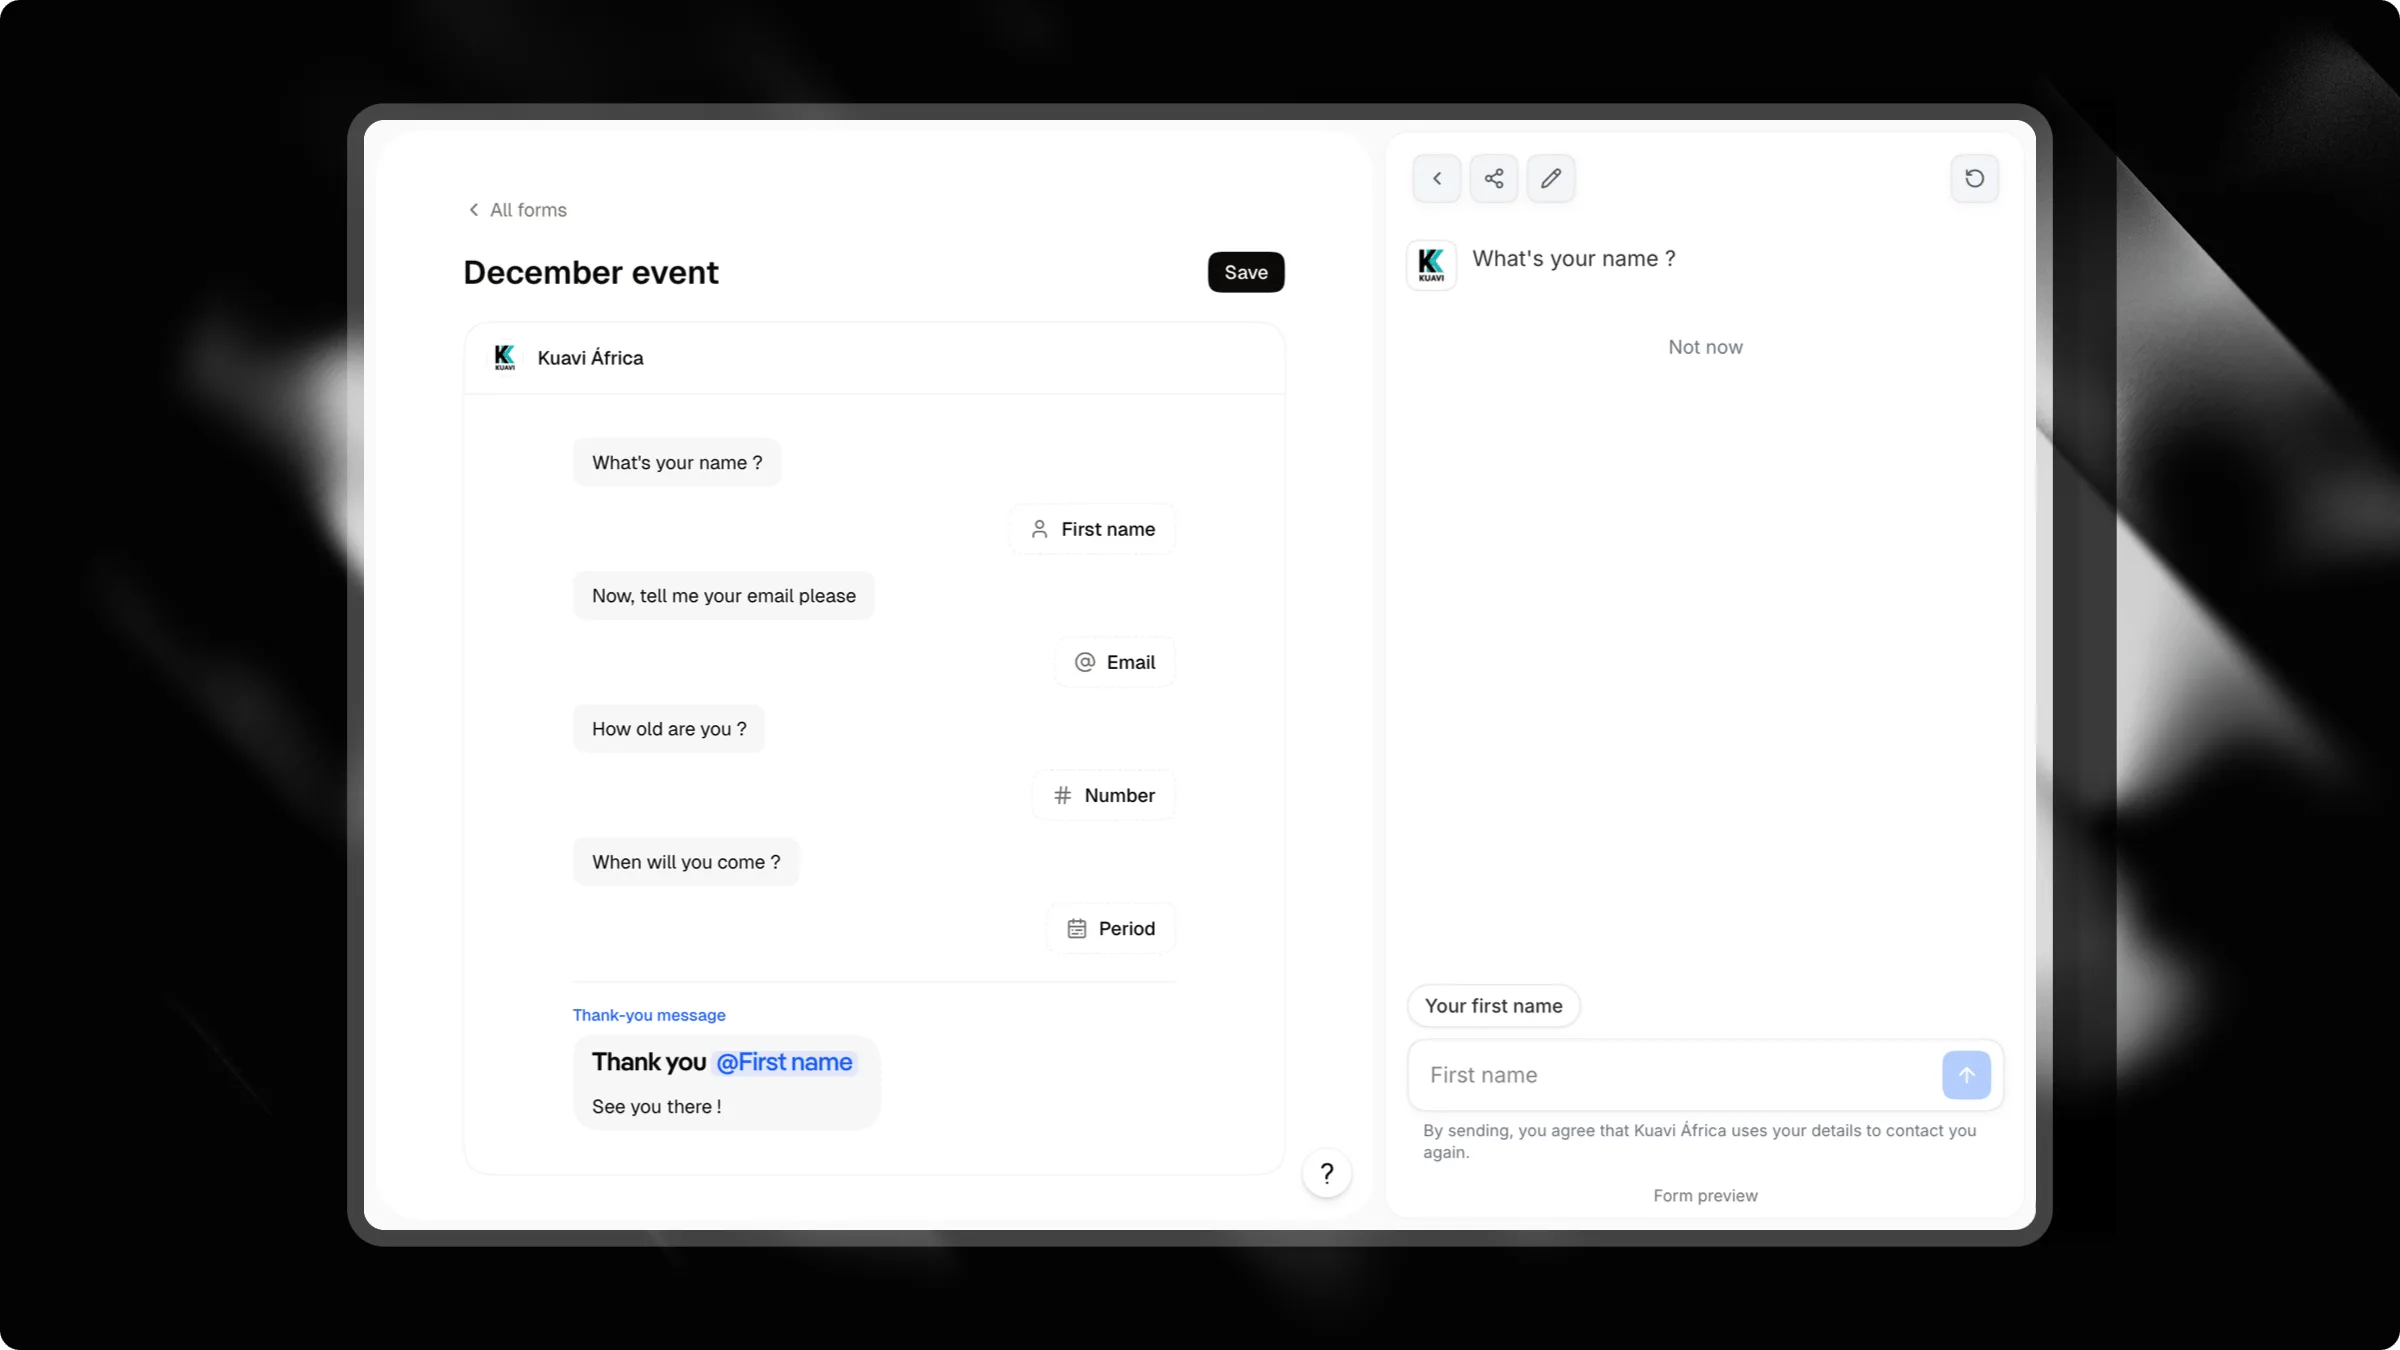
- Type plain text to make your chat speak. Each paragraph becomes an individual chat bubble.
- Type
/to insert questions, choices, media, or contact fields. - Drag blocks using the handle on the left to reorder your sequence.
- Preview in real time: the preview panel on the right runs your form in an interactive chat as you edit.
- Save your work: click Save in the top-right corner when you are ready to publish changes.
Available blocks
Type/ anywhere in the editor to open the block menu:
Chat messages
Visitor answers
When the form reaches an answer block, the chat input bar adapts to what is expected.Contact fields
Contact fields capture visitor details and qualify leads in your CRM. Each contact field can appear once per form:Thank-you message and redirection
The last block in your editor is the thank-you message. This message displays automatically when a visitor finishes the form. You can personalize this final message by typing@ to cite any earlier response:
Automatic redirection
You can redirect visitors to an external address (such as a payment page, a calendar booking, or your main website) after they complete the form:- Click the end block at the bottom of the form editor.
- Enter a full address (
https://...) in the Redirect URL field.
How visitors experience your form
The form runs directly inside the chat interface:- Step by step: The chat asks one question at a time.
- Context-aware input: For phone, date, or text inputs, the chat input bar displays a dedicated badge (such as “Your WhatsApp” or “Preferred date”) and sets the correct mobile keyboard.
- Side questions: Visitors can click the × icon on the input badge to pause the form and ask a question. The chat answers using your knowledge base, then resumes the form at the current step.
- Exit option: Under choice or checkbox questions, visitors can tap “Not now” to leave the form flow without breaking the conversation.
Connecting your form
You can trigger a form through four different paths:1. Triggers
Add a Form trigger in your chat’s Triggers tab. Select your form from the dropdown. It appears as an interactive button in your chat menu.2. Campaigns (Launch on arrival)
In Campaigns, select your campaign channel and set Launch on arrival to your form trigger. When visitors click your ad or campaign link, the chat opens with the form already active, without requiring an initial click.Campaigns
Learn how to build dedicated welcome screens for paid ads with custom headlines and automatic form launch.
3. Chat goal (Capture leads)
In Actions > Goal, select Capture leads. Attlas connects your lead objective directly to a form. When the conversation reaches lead capture, the assistant starts the form and automatically pre-fills any details the visitor already mentioned.4. Direct link
Share a link with the?form=<slug> parameter to open your chat directly on a specific form.
Tracking performance (Funnel)
On the Forms list page, click the chart icon next to any form to expand its conversion funnel. The funnel tracks data over the last 30 days:- Starting points: Shows where visitors came from, including visits from ad campaigns and clicks on menu triggers.
- Step completion: Displays the number of visitors who answered each step, along with the retention rate compared to the previous step.
- Leads generated: The total number of completed contacts collected by this form.
Internal test conversations from workspace members and editor previews are excluded from funnel metrics.
Data collection and integrations
- CRM: Submitted details appear immediately in your CRM tab, with all custom answers saved to the contact record.
- Webhooks: Completing a form dispatches a
form_completedwebhook payload containing all answers and contact information. - Meta CAPI: When Meta Conversions API is configured, completing a form sends a
Leadevent server-side for ad tracking. - Automatic translations: Form text is translated automatically into all 13 supported languages so visitors see questions in their preferred language.