> ## Documentation Index
> Fetch the complete documentation index at: https://attlas.so/docs/llms.txt
> Use this file to discover all available pages before exploring further.

# Share your chat anywhere

> Explore the different ways to distribute your chat and reach your audience.

Once your chat has been configured and trained, it's time to share it with the world.

Attlas provides multiple distribution methods so you can choose the one that best fits your audience, channel, or project.

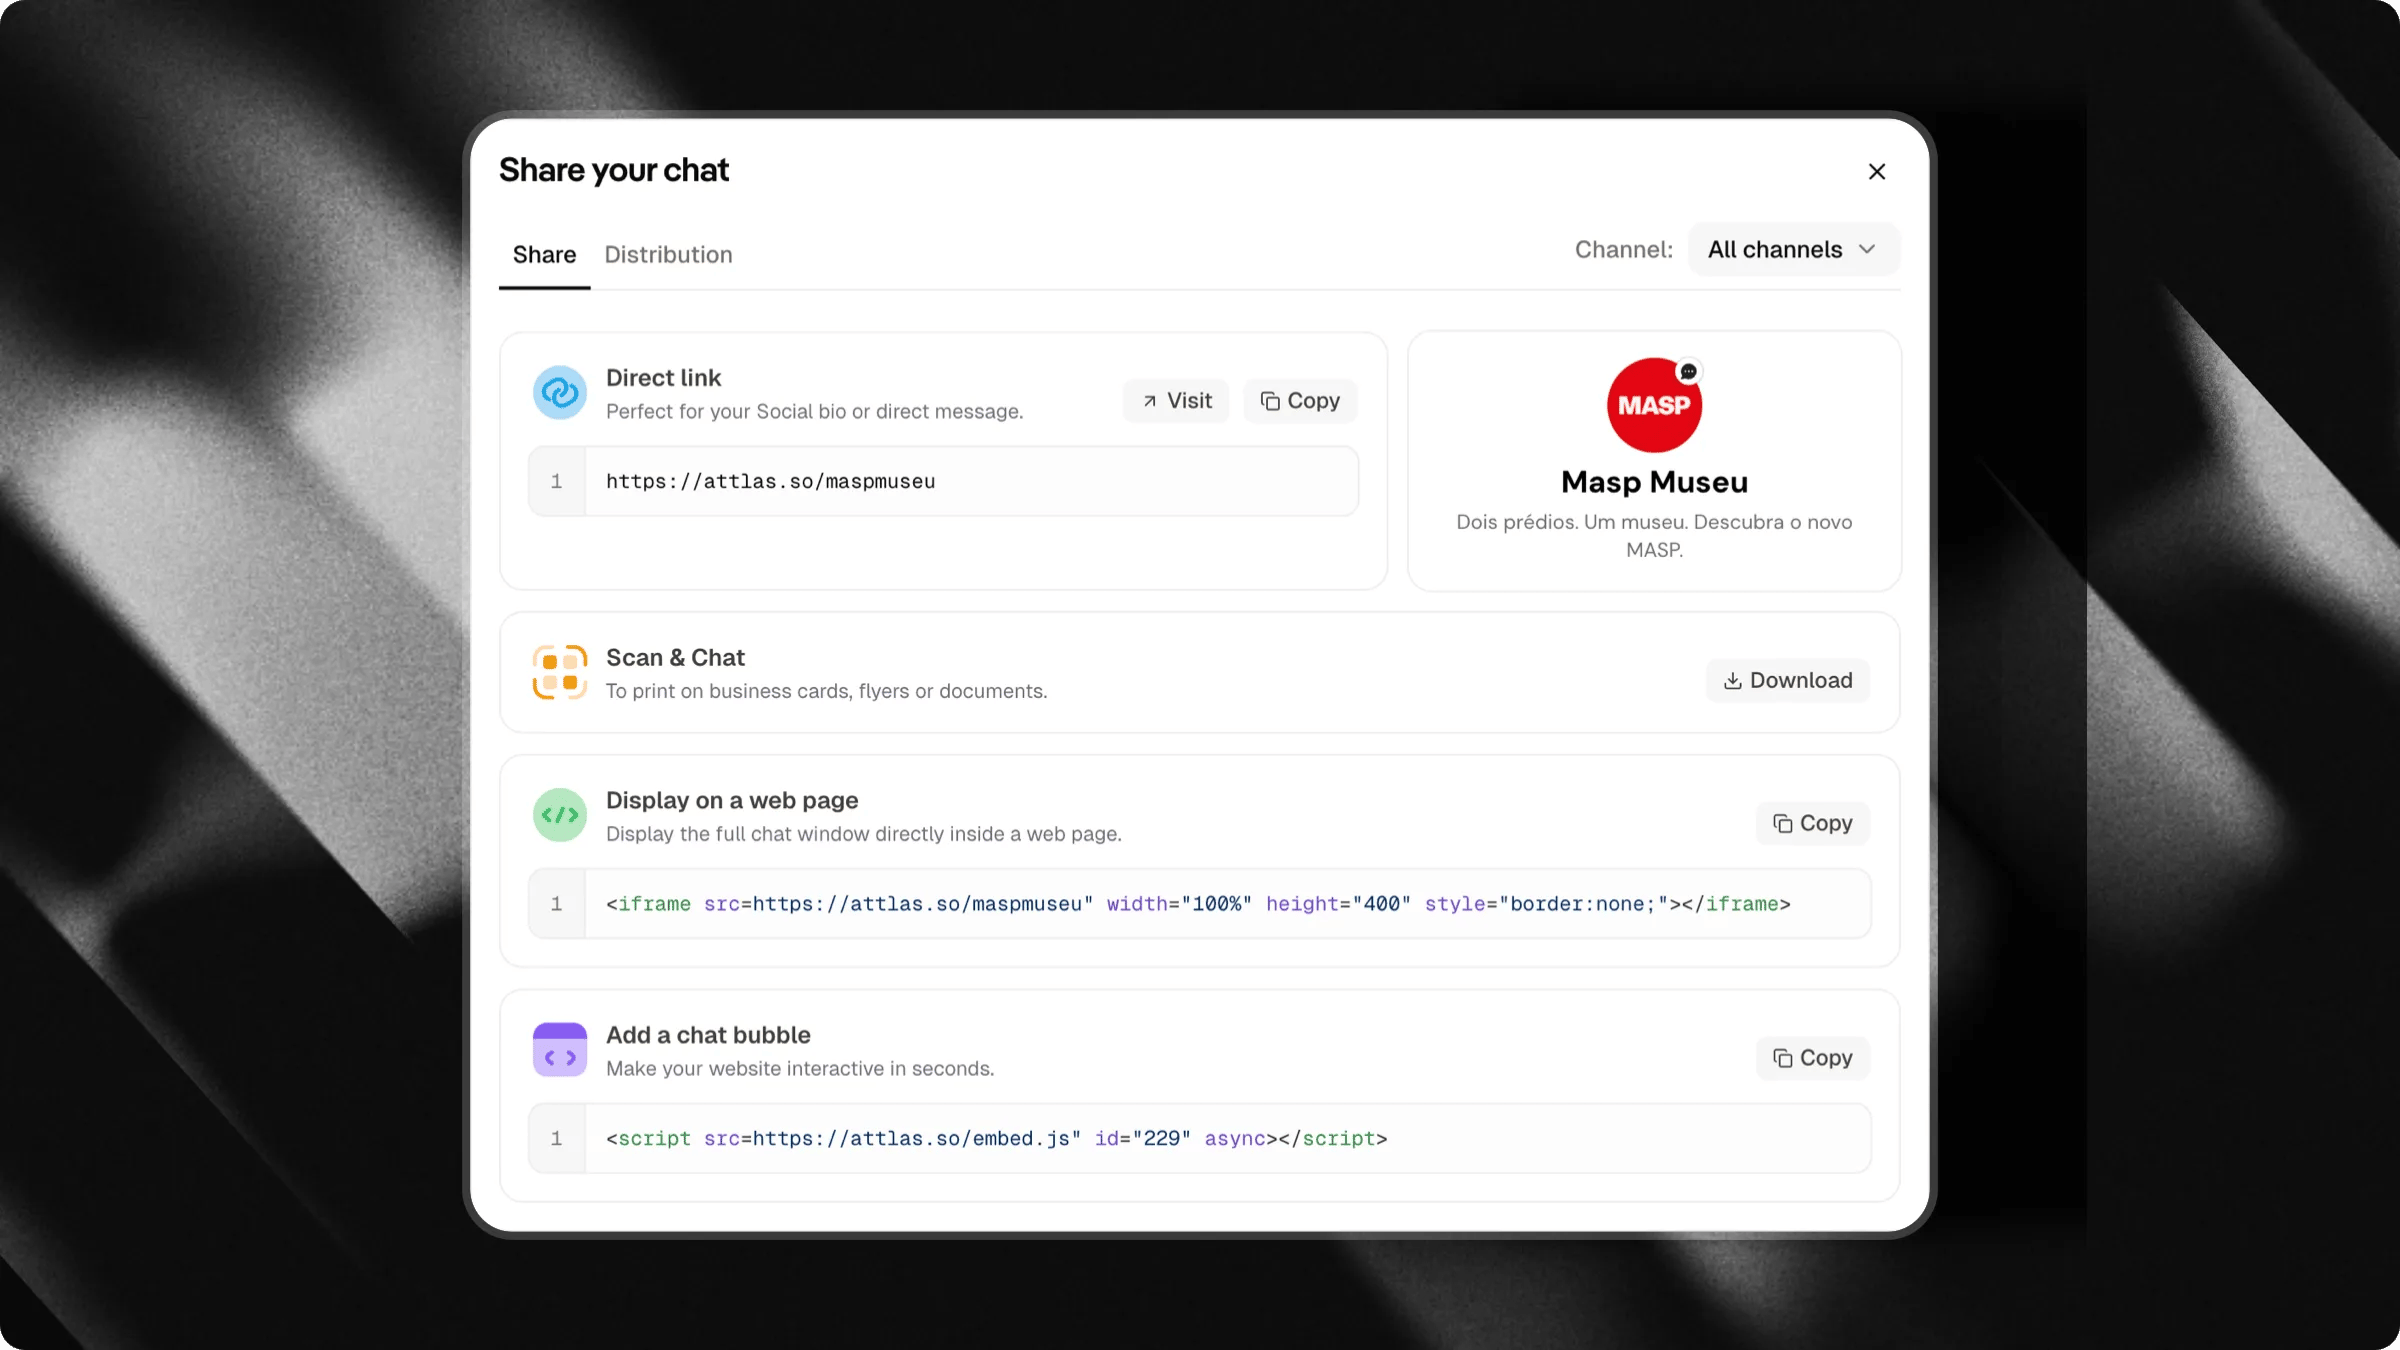
To access these options, click the **<kbd>Share</kbd>** button located in the top-right corner of the platform.
<img src="https://mintcdn.com/attlas/yh8lvZ6EJN15xG2l/images/sharing-options.webp?fit=max&auto=format&n=yh8lvZ6EJN15xG2l&q=85&s=be47ae21fdd67838cb93068e11391871" alt="Sharing Options 1" width="2400" height="1350" data-path="images/sharing-options.webp" />

***

## Sharing options

Here are the 4 main ways to share your chat:

1. **Direct link**: Perfect for social media, emails and messaging apps.
2. **Scan & Chat (QR Code)**: Ideal for printed materials and physical locations.
3. **Chat bubble**: A floating button at the bottom of your website.
4. **Display on a page (Iframe)**: An inline widget integrated directly into your pages.

***

## Direct link

The direct link lets you share a full-page version of your chat. You can use it across various platforms:

* **Social media**: Share links directly in posts or bio links (Instagram bio, LinkedIn, Linktree).
* **Messaging**: Send directly via WhatsApp, SMS, or Telegram.
* **Email**: Add to newsletters, campaigns, or email signatures.
* **Promotional materials**: Add to presentations, PDFs, or documents.

Simply copy the generated public link from your dashboard and share it with your audience.

***

## Scan & Chat (QR Code)

Connect the physical world to your AI chat by generating a custom QR Code. It is highly effective for:

* **Printed materials**: Business cards, flyers, catalogs and booklets.
* **Physical locations**: Restaurant menus, tables, packaging, or posters.
* **Events**: Banners, trade show stands and presentations.

When scanned, users will be taken directly to your chat in their mobile browser.

<Info>
  If you change your username in the **Profile** section, you will need to generate and download a new QR Code.
</Info>

***

## Add a chat bubble

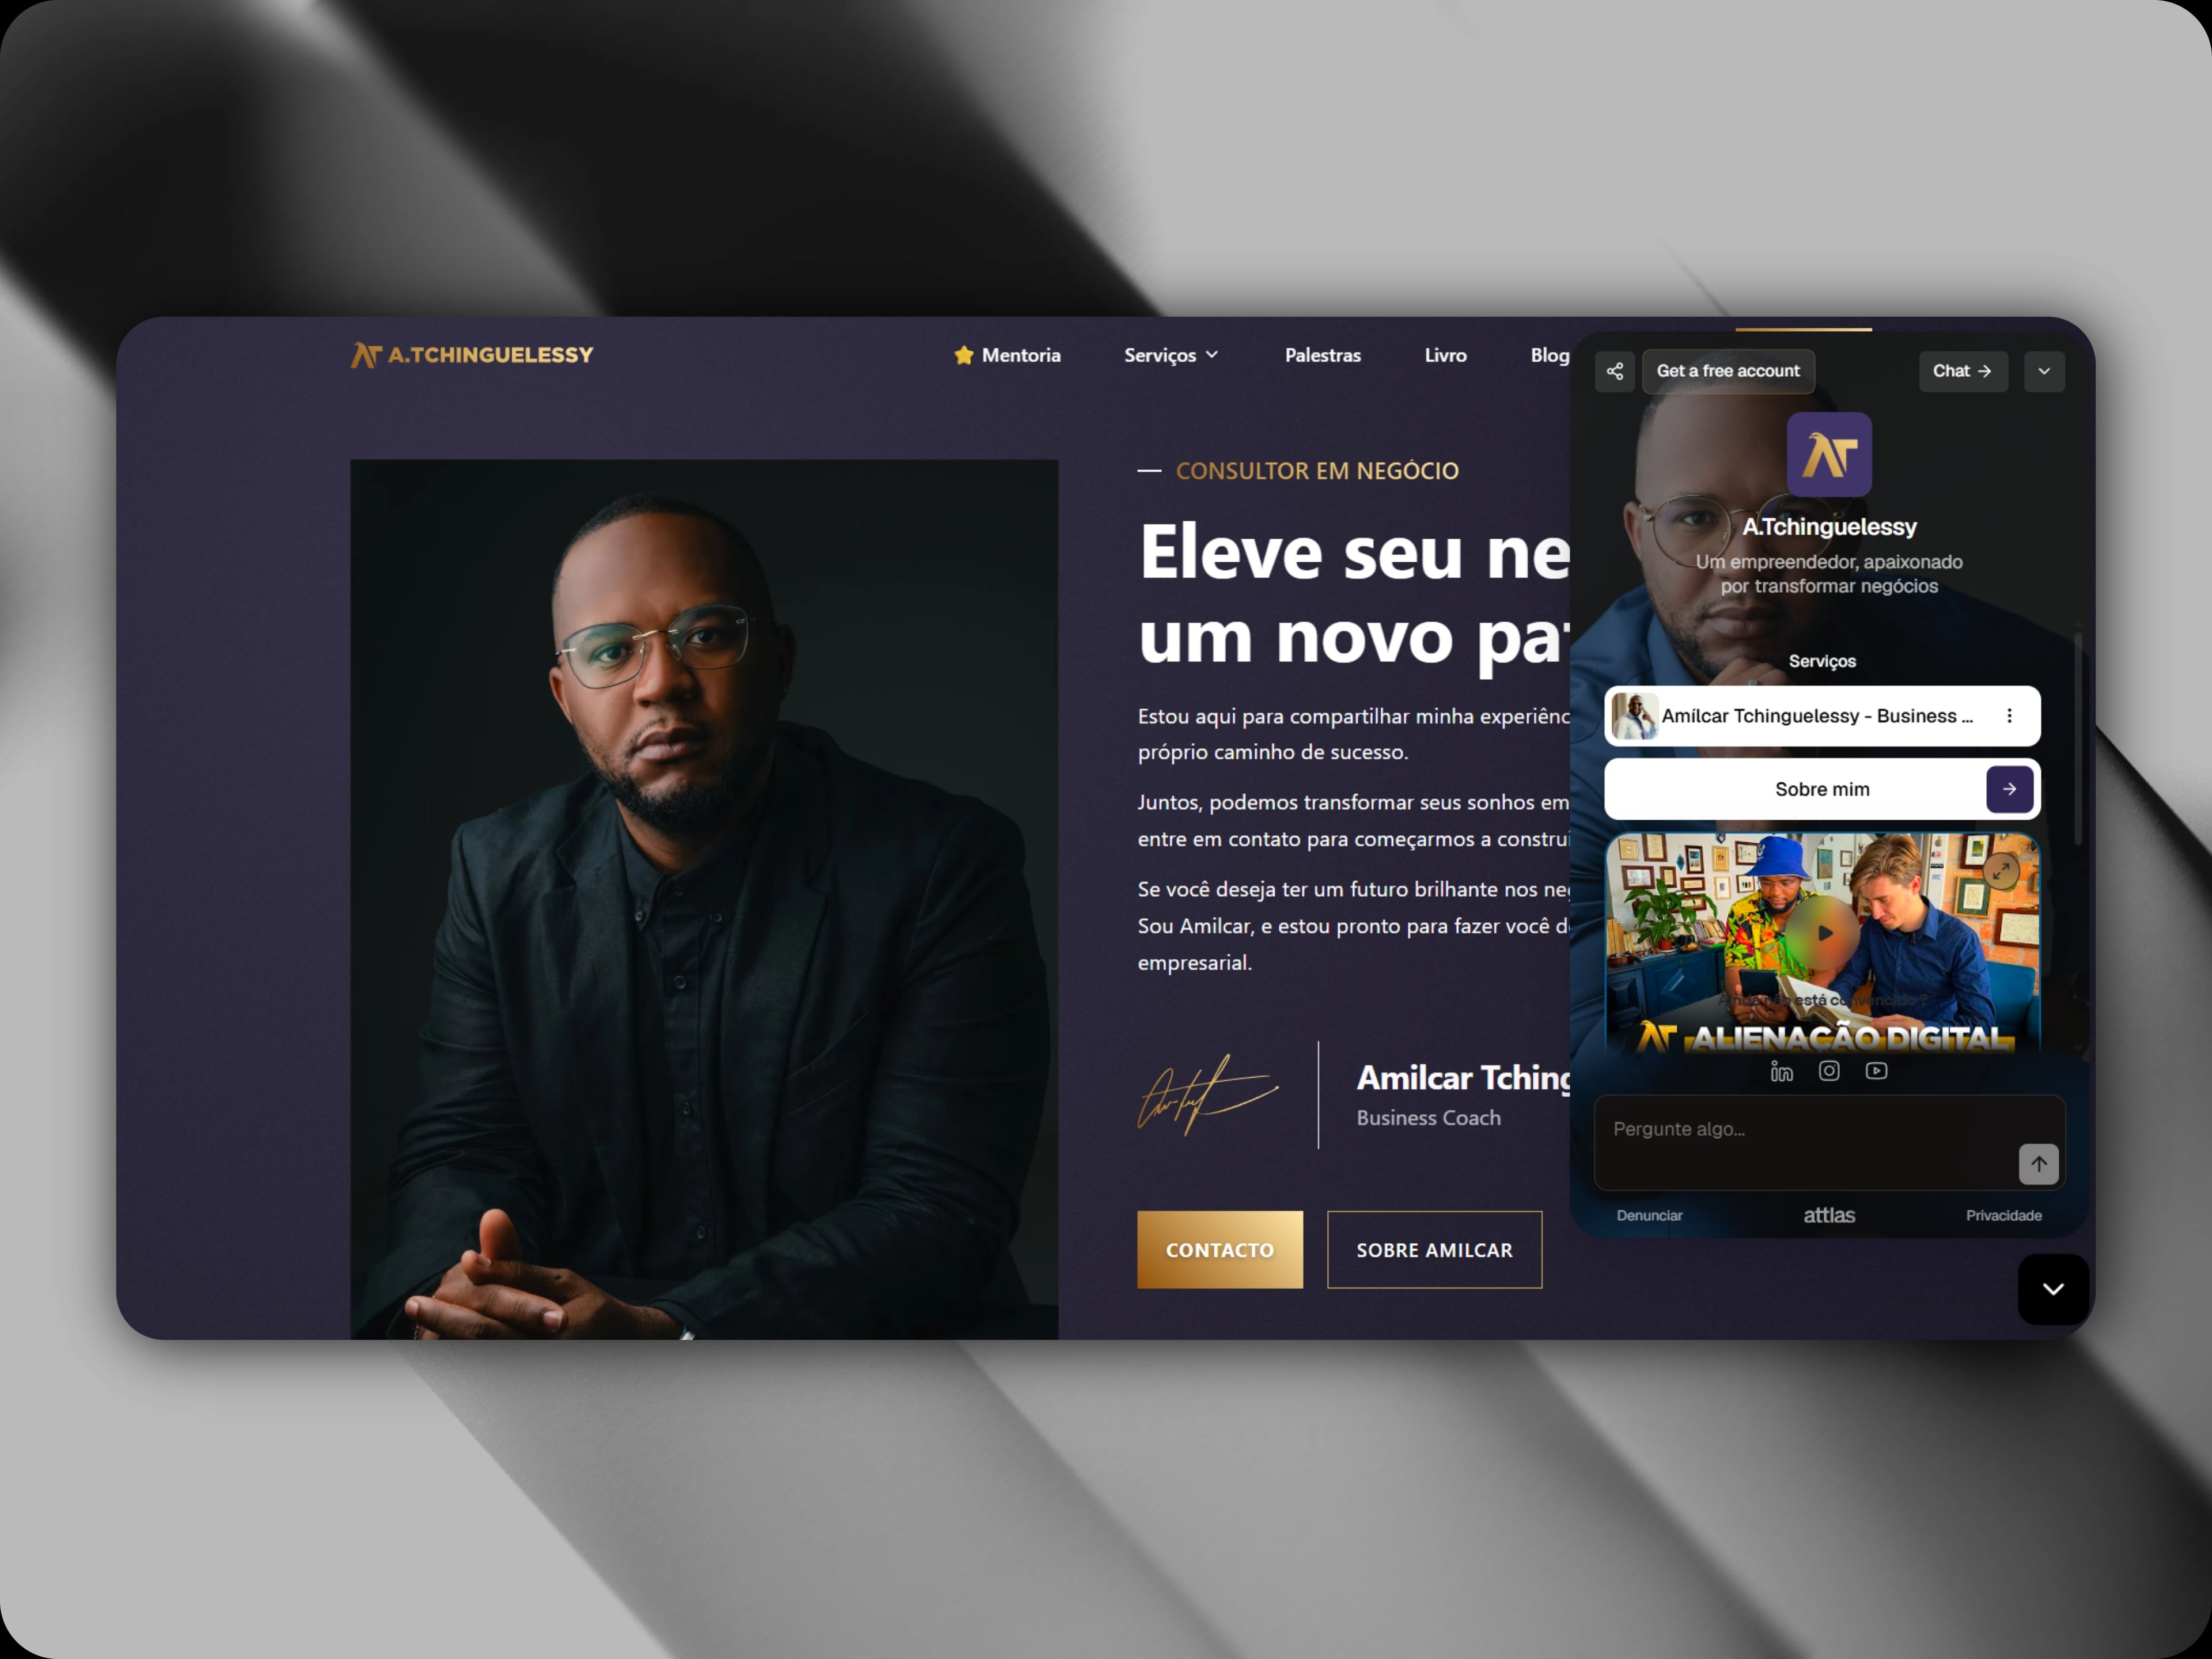
Add a floating chat bubble in the bottom corner of your website so visitors can interact with your assistant without leaving your site.
<img src="https://mintcdn.com/attlas/DdcP0axzfbfhurck/images/attlas-bubble-chat-site.jpg?fit=max&auto=format&n=DdcP0axzfbfhurck&q=85&s=ca1dd18fa32d47c1e8498b563cb6efab" alt="Attlas Bubble Chat Site" width="3840" height="2880" data-path="images/attlas-bubble-chat-site.jpg" />

<Note>
  The chat bubble sharing option is available exclusively on the **Attlas Starter and PRO plans**.
</Note>

### Installation

Copy the script snippet and paste it right before the closing `</body>` tag of your HTML:

```html theme={null}
<script 
  id="attlas-widget" 
  data-chat-id="YOUR_CHAT_ID" 
  src="https://attlas.so/embed.js" 
  defer>
</script>
```

### Domain Whitelisting

To protect your account's quota and ensure your chat is only loaded on your own website, you can restrict the domains authorized to run the script.

<img src="https://mintcdn.com/attlas/EQVDov67KelrRCnW/images/white-list-domains.webp?fit=max&auto=format&n=EQVDov67KelrRCnW&q=85&s=02e36363c6fb6769a791f745bc592b16" alt="Screenshot Studio 1781949144938" width="1200" height="675" data-path="images/white-list-domains.webp" />

* **How it works:** In your chat's **Embed Settings**, you can specify a list of allowed domains (e.g., `mywebsite.com`). The widget script will only initialize on these origins.
* **No domain specified (Default):** If the allowed domains list is empty, the widget script will function on **any domain** (useful for local testing).

<Info>
  The domain whitelist check is executed dynamically when the script fetches the widget configuration.
</Info>

***

## Display on a page

The **Display on a page** option allows you to embed the full chat directly into a webpage using an iframe. By adding this code to your website, blog, or Notion page, the chat will appear directly within the page content.

This option is ideal for:

* Help centers and FAQ pages
* Knowledge bases and documentation sites
* Support portals
* Internal dashboards

### Installation

Copy and paste the following HTML code into your website's editor where you want the chat to appear:

```html theme={null}
<iframe 
  src="https://attlas.so/chats/your-chat-slug?embed=true" 
  width="100%" 
  height="700px">
</iframe>
```

<Tip>
  You can adjust the iframe's width and height to fit your website layout.
</Tip>

<Warning>
  **Security Note:** The domain whitelist configuration (`allowed_domains`) **only applies to the widget script**. It does not protect or restrict the direct loading of the iframe URL. Anyone embedding the direct iframe URL on a custom page will still be able to render and interact with the chat.
</Warning>

***

## Distribution channels

The **Distribution** tab in the Share panel lets you create named channels to track where your conversations are coming from, for example, distinguishing users who arrived via your website from those who came through a newsletter or a QR code at an event.

### What is a channel?

A channel is a label you define (e.g. `website`, `newsletter`, `event-june`). When you select it in the Share tab, Attlas automatically appends an `?origin=<channel>` parameter to every share method you copy:

| Share method       | With channel selected                              |
| :----------------- | :------------------------------------------------- |
| Direct link        | `https://attlas.so/your-chat?origin=website`       |
| Iframe embed       | `src="https://attlas.so/your-chat?origin=website"` |
| Chat bubble script | `<script ... data-origin="website" ...>`           |

This lets you see in your analytics which channel drove each conversation.

### Creating a channel

<img src="https://mintcdn.com/attlas/_pqFMRFKPEcI1q_u/images/distribution-channel_1.webp?fit=max&auto=format&n=_pqFMRFKPEcI1q_u&q=85&s=4d1d2b08140a886159b8c926e259fe03" alt="Distribution channels tab" width="2400" height="1350" data-path="images/distribution-channel_1.webp" />

1. Open the **Share** panel and switch to the **Distribution** tab.
2. Click in the channel input field and type a name (e.g. `newsletter`), then press **Enter** to add it.
3. Repeat to add as many channels as you need.
4. Channels are saved automatically, no extra confirmation needed.

<Info>
  Channel names are slugified automatically: spaces and special characters are converted to hyphens and lowercased (e.g. `My Blog Post` → `my-blog-post`).
</Info>

### Using a channel when sharing

<img src="https://mintcdn.com/attlas/c3qHZroRSVubJ6wE/images/distribution-channel_2.webp?fit=max&auto=format&n=c3qHZroRSVubJ6wE&q=85&s=4722575b1149fcca0808469ec7e443e5" alt="Distribution channels link sharing" width="2400" height="1350" data-path="images/distribution-channel_2.webp" />

1. Switch back to the **Share** tab.
2. If you have channels defined, a dropdown appears at the top of the tab.
3. Select the channel that matches the destination you are sharing to.
4. Copy the link, iframe code, or script, the `origin` parameter is already included.

<Tip>
  Leave the channel selector on **All channels** when you want a generic link without attribution.
</Tip>

***

## Which option should you choose?

Each sharing method serves a different purpose:

| Option                | Best for                                        | Channel tracking     | Domain Whitelisting             |
| :-------------------- | :---------------------------------------------- | :------------------- | :------------------------------ |
| **Direct link**       | Quick sharing across any digital channel        | Yes (`?origin=`)     | No                              |
| **Scan & Chat**       | Physical materials and QR Codes                 | Yes (encoded in QR)  | No                              |
| **Chat bubble**       | Adding an interactive assistant to your website | Yes (`data-origin=`) | **Yes** (restricts widget load) |
| **Display on a page** | Embedding the full chat experience inline       | Yes (`?origin=`)     | No (bypasses domain checks)     |

You can use one or several of these options at the same time, creating more opportunities for users to interact with your chat.
